impulse 2.1

U021 Reading and analyzing CSV files

from hassnainmh

What is a CSV file?

CSV is an abbreviation for Comma Separated Values and a CSV file is a file that separates the tabular data with commas. When a CSV file is opened in a CSV reader like Microsoft Excel the values are automatically shown in a table. It is among the most used formats for exchanging data.

An example of CSV:

column1,column2,column3,
firstrowdata1,firstrowdata2,firstrowdata3
secondrowdata1,secondrowdata2,secondrowdata3

In this depiction, you can notice that each value is separated by a comma. The first line is always table head, it can also be called the name of a data column. Every following line/row has the real data which is also restricted by file size constraints.

Specific CSV Files

CSV in MS Excel has different formats that you come across while saving your file with "Save As". Though it depends on the version of Excel you are using. Excel in MS Office 365 has 4 types of CSV formats.

  1. CSV UTF-8 (Comma delimited)

  2. CSV (Comma delimited)

  3. CSV (Macintosh)

  4. CSV (MS-DOS)

Among these 4, CSV (Macintosh) is dedicated to Mac computers while all others are available in MS Windows. All four have distinguished kind of character coding, i,e the terminating character for a record or line used in Macintosh type is CR (Carriage Return). On the other hand, the other three utilize CR/LF (Carriage Return/Line Feed). These three formats are furtherly separated by the type of code page they use. The code page relates to the encoding of individual characters. If your data has the use of foreign characters or accented characters then Code pages difference takes place. The code pages used by each format furtherly depends on

  1. the Excel version

  2. language version of Excel

  3. your regional settings configuration

impulse CSV Reader

The CSV Data and Log Reader is a configurable reader for all typical kinds of CSV (Comma-Separated Values) based data and log formats. CSV is a common data exchange format that is widely supported by consumer, business, and scientific applications. With easy to use dialogs you can define configurations (separators, first line, labels, data types,...) for your specific formats.

The CAN trace data

Starting point of this tutorials is an embedded system that produces a trace for received can data. The trace contains 4 data columns. 2 integer values (delay in ms and no of received data) and 2 float values (internal axis data)), preceded by a timestamp in ms.

timeInMillies;delay;received;axisA;axisB
1565436982527 ;140 ;0 ;0.0 ;0.0
1565436982578 ;51 ;0 ;0.0 ;0.0
1565436982606 ;28 ;0 ;0.0 ;0.0
1565436982618 ;12 ;0 ;0.0 ;0.0
1565436982639 ;21 ;0 ;0.0 ;0.0
1565436982658 ;19 ;0 ;0.0 ;0.0
1565436982686 ;28 ;0 ;0.0 ;0.0
1565436982766 ;80 ;170314 ;2128.925 ;112.04868421052633
1565436982770 ;4 ;0 ;0.0 ;106.44625
1565436982798 ;28 ;0 ;0.0 ;101.12393750000001
1565436982810 ;12 ;0 ;0.0 ;96.06774062500001
1565436982830 ;20 ;0 ;0.0 ;91.26435359375002
1565436982851 ;21 ;0 ;0.0 ;86.70113591406252
1565436982871 ;20 ;201401 ;10070.05 ;612.3687106973067
1565436982891 ;20 ;0 ;0.0 ;581.7502751624413
1565436982911 ;20 ;0 ;0.0 ;552.6627614043193
H200 View - How to create a new view

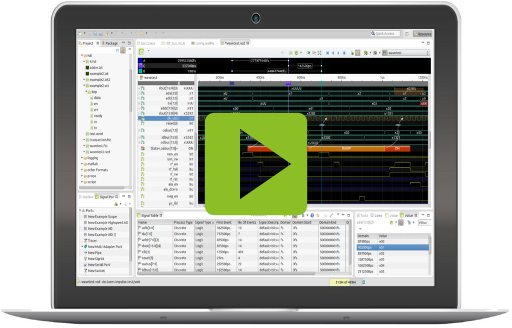
A view combines a set of plots organized in rows. You may switch between multiple views using the the combo box in the top right corner.

  1. Use the "Add new view" toolbar button.
  2. Select if the new view shall be empty or populated.
  3. Press ok to create the view.
  4. Use the signal area to drag&drop signal into the new view.
H201 View - How to switch between views

You can use an unlimited number of views for a record file. The upper-right button in the toolbar is used to switch between multiple views.

  1. Use the combo box in the right top corner to switch between views.
  2. You may select the "Filter" fields to limit the views in the combo box to those that 'fit' to your signals.
  3. Use the preferences page "impulse/views" to manage your views.
H202 View - How to add signals to a view

The signal area is used to find signals in the record (wave, trace, log,..) file and convert them into a plot that can be shown in the Plot Area.

  1. Use the signal area to drag&drop signals or scopes into the view.
  2. You may use the filter to find your signals.
  3. Or you may select the context menu of the view tree to add a new plots.
H203 View - How to resize a plot

  1. When you select a plot in the view, there will be a small resize grip left-hand of the name.
  2. Select the grip and move the cursor to resize.
  3. Release the grip to keep the size.
H204 View - How to re-organize views

Inside of a view you find Plots to display the signal data and Folders to organize the presentation in a hierarchical structure. This enables the user to hide/show parts of the presentation.

  • You can add single elements (folders, plots of multiple types) to the hierarchical structure by opening the context menu of the configuration with a right mouse click.
  • You can reorder all elements by selecting and moving them with the mouse.
  • To remove elements you open the context menu, click delete or mark the elements that you want to remove and press the delete key.
  • You can edit an existing plot (or multiple plots) by opening the edit dialogue with the context menu or by double-clicking the element whose configuration you want to change.

Screen Cast: Reading and analyzing CSV files

How to Configure the Reader for the CAN trace

The CSV Reader requires a configuration (CSV Configuration) to work. A configuration contains information about the char set, the delimiter, labels and and the actual data fields.

From the menu bar click on "Window" from the submenu chose "Preferences" a box will open, there click on "Impulse" from the left hand side menu. Then click on "Serializer" and choose "CSV Data and Log (CSV)", double click it, there will pop a window with already configurations. On the right side, there will be a button "Add" by clicking it you can add your configurations, so, click on it.

Now you are on CSV Configuration form.

  • Give it a name i,e "firstCSV";
  • In the description box type useful comment;
  • In Char Set box you can choose either default or your desired one;
  • Domain base then defines the smallest change in time, choose 1us;
  • Now there's a Geometry section:
    • Choose the needed number of columns; here we have 5 columns;
    • Choose a separate; here its a semicolon
  • From Mode section choose "Create Individual signals per column" option. This will let the reader create a seperate signals for all 4 data columns;

The next section is about the data columns, here you will choose the data types. Data types should be according to the type of field. Leave the first type as none, the second field is for 'delay' so choose integer data type, the third field is for received so, it should also be an integer, and the remaining 2 should be float.

The last section is Domain value choose the values as follows:

  • Mode: Integer value (e.g. 100 us, 50)
  • Source: Column 1/A
  • Domain Unit: 1ms

Mark the checkbox below to enable relative domain values and press the OK button.

Again click on OK and then on APPLY, hence the configuration is completed.

How to show the data in a view?

Now, it’s time to show the data.

  • Get to the Navigator window and double-click the "canbustrace.csv", alternativlely use the content menu: Open With > Impulse Viewer.
  • The popup window will ask you to create a new view, click on YES. Choose "Add a flat list of all signals" and  click OK.
  • On the left side, you can see signals and on the right side, you find the tree and the plots of the new view.

Now you have successfully shown the data in a view.

More articles in this series

Reading and analyzing CSV logs

coming soon
toem

technical software and tooling

Company

Contact Us

This email address is being protected from spambots. You need JavaScript enabled to view it.