Create an XY chart from 2 numerical signals
The plot dialog is roughly divided as follows;
On the left side is defined what to display, on the right side how to display it.
In this case an XY chart shall be displayed, so choose the type "Chart" and select the XY chart in the field "Chart Style".

Next, we have to define what is to be displayed, i.e. a signal has to be selected. However, we have 2 signals.
But the display side always expects one signal. In the case of the XY chart this can be either an Array or a Struct signal with 2 numeric members.
The solution is to combine the input signals with a production. In this case the Array Combiner.


A view combines a set of plots organized in rows. You may switch between multiple views using the the combo box in the top right corner.
- Use the "Add new view" toolbar button.
- Select if the new view shall be empty or populated.
- Press ok to create the view.
- Use the signal area to drag&drop signal into the new view.
You can use an unlimited number of views for a record file. The upper-right button in the toolbar is used to switch between multiple views.
- Use the combo box in the right top corner to switch between views.
- You may select the "Filter" fields to limit the views in the combo box to those that 'fit' to your signals.
- Use the preferences page "impulse/views" to manage your views.
The signal area is used to find signals in the record (wave, trace, log,..) file and convert them into a plot that can be shown in the Plot Area.
- Use the signal area to drag&drop signals or scopes into the view.
- You may use the filter to find your signals.
- Or you may select the context menu of the view tree to add a new plots.
- When you select a plot in the view, there will be a small resize grip left-hand of the name.
- Select the grip and move the cursor to resize.
- Release the grip to keep the size.
Inside of a view you find Plots to display the signal data and Folders to organize the presentation in a hierarchical structure. This enables the user to hide/show parts of the presentation.
- You can add single elements (folders, plots of multiple types) to the hierarchical structure by opening the context menu of the configuration with a right mouse click.
- You can reorder all elements by selecting and moving them with the mouse.
- To remove elements you open the context menu, click delete or mark the elements that you want to remove and press the delete key.
- You can edit an existing plot (or multiple plots) by opening the edit dialogue with the context menu or by double-clicking the element whose configuration you want to change.
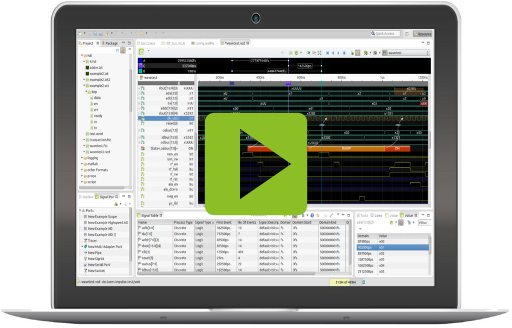
Screen Cast: Logging and Tracing 6 - Creating charts and statistics
Count the nubmer of fatals, errors and warnings for one log signal
To calculate the statistics I use again the SignalScript production as in the 2nd part of this series.
For the BIRT chart we need a structure signal. To do so, we must first define the members.
The next step is to iterate over the input signal and fill the predefined variables accordingly.
The last step is to fill the detected data into the structure members and write them into the output signal.
Instead of the Time domain, the Index domain is used here.
The following snippets require further explanation:
var members ;
if (members == null) {
...
}

....

progress.cont();  // forces the production to call this script again (with allready processed data), if more data arrives.

In online mode, the input signals become larger and larger. Depending on the type of operation to be defined, it may be possible to simply call the script again in the same context (the variables keep their values and the iterator is still at the same position).
This can be achieved by putting the following line at the end of the script.
progress.cont(); // forces the production to call this script again (with allready processed data), if more data arrives.
When the script is actually called again, make sure that the initialized variable is not reinitialized, hence the lines:
var members ;
if (members == null) {
...
}
The next snippet is about updating the statistics.
} else {

    // reopen for next statistic
    out.open(0);
}
...
out.close(); // We want to get more input data but close the output - statistic is complete for this time
In most cases (e.g. mathematical operation) the output signal becomes longer with the input signals. For example, with each iteration a sample is fetched, processed and written.
In the case of statistics, however, we only want to update the data record.
So we rewrite the data again and again.
Therefore the output can be closed at the end and must be opened again at the beginning of the new call.
// in0         : Primary input (de.toem.impulse.samples.ISamplePointer,de.toem.impulse.samples.IReadableSamples)
// in1..       : Additional inputs (de.toem.impulse.samples.ISamplePointer,de.toem.impulse.samples.IReadableSamples)
// input:      : An array of all inputs
// out         : Output signal writer (? extends de.toem.impulse.samples.ISamplesWriter)
// iter        : Sample iterator  (de.toem.impulse.samples.ISamplesIterator)
// progress    : Progress control (de.toem.impulse.samples.producer.IScriptProgress)
// console     : Console output (de.toem.impulse.scripting.IScriptConsole)

// create struct signal members
var members ;
if (members == null) {

    // crate members of the output struct
    members = out.createMembers(5);
    out.createMember(members, 0, "Fatal", ISample.STRUCT_TYPE_INTEGER, null, -1);
    out.createMember(members, 1, "Error", ISample.STRUCT_TYPE_INTEGER, null, -1);
    out.createMember(members, 2, "Warning", ISample.STRUCT_TYPE_INTEGER, null, -1);
    out.createMember(members, 3, "Other", ISample.STRUCT_TYPE_INTEGER, null, -1);
    out.createMember(members, 4, "Label", ISample.STRUCT_TYPE_TEXT, "LABEL", -1);

    // init vars
    var fatal = 0;
    var error = 0;
    var warning = 0;
    var other = 0;
} else {

 	// reopen for next statistic
    out.open(0);
}
// iterate and count
while (iter.hasNext()) {
    var current = iter.next(out);
    if (!input[0].isNone()) {
        switch (in0.getTag()) {
            case 1:
                fatal++;
                break;
            case 2:
                error++;
                break;
            case 3:
                warning++;
                break;
            default:
                other++;
        }
    }
}

// write to output
members[0].setIntValue(fatal);
members[1].setIntValue(error);
members[2].setIntValue(warning);
members[3].setIntValue(other);
members[4].setStringValue("Series 1");
out.write(0, false, members);
progress.cont();  // forces the production to call this script again (with allready processed data), if more data arrives.
out.close(); // We want to get more input data but close the output - statistic is complete for this time


Count the number of fatals, errors and warnings for multiple log signal
The SignalScript production can handle multiple signal inputs. If the standard iterator (iter) is used, it moves the input pointers to the next change at each iteration step ( The valid samples (pointer positions) in this step are shown in red).

The following script is supposed to show the total number of errors, fatalities,... but also the number per signal. The script is very similar to the previous one, but I would like to explain the following lines:
    for (var n = 0; n < input.length; n++) {
        if (!input[n].isNone() && input[n].hasIndexChanged()) {
In each step all input pointers are iterated over. To avoid that the same samples are counted again in the following step, the function "hasIndexChanged" is used. The iterator sets this flag in the pointers that were moved.
The remaing script again defines the members, iterates over the input signal and fill the predefined variables, fills the detected data into the structure members and writes them into the output signal.
// in0         : Primary input (de.toem.impulse.samples.ISamplePointer,de.toem.impulse.samples.IReadableSamples)
// in1..       : Additional inputs (de.toem.impulse.samples.ISamplePointer,de.toem.impulse.samples.IReadableSamples)
// input:      : An array of all inputs
// out         : Output signal writer (? extends de.toem.impulse.samples.ISamplesWriter)
// iter        : Sample iterator  (de.toem.impulse.samples.ISamplesIterator)
// progress    : Progress control (de.toem.impulse.samples.producer.IScriptProgress)
// console     : Console output (de.toem.impulse.scripting.IScriptConsole)

// create struct signal members
var members  ;
if (members == null) {

    // crate members of the output struct
    members = out.createMembers(6);
    out.createMember(members, 0, "Fatal", ISample.STRUCT_TYPE_INTEGER, null, -1);
    out.createMember(members, 1, "Error", ISample.STRUCT_TYPE_INTEGER, null, -1);
    out.createMember(members, 2, "Warning", ISample.STRUCT_TYPE_INTEGER, null, -1);
    out.createMember(members, 3, "Other", ISample.STRUCT_TYPE_INTEGER, null, -1);
    out.createMember(members, 4, "Pass", ISample.STRUCT_TYPE_INTEGER, null, -1);
    out.createMember(members, 5, "Label", ISample.STRUCT_TYPE_TEXT, "LABEL", -1);

    // init vars
    var fatal = [0];
    var error = [0];
    var warning = [0];
    var other = [0];
    var passFail = [null];

    for (var n = 0; n < input.length; n++) {
        fatal[n + 1] = 0;
        error[n + 1] = 0;
        warning[n + 1] = 0;
        other[n + 1] = 0;
        passFail[n + 1] = 0;
        console.println("Input" + n + ":" + input[n].getId());
    }
} else {
 	// reopen for next statistic
    out.open(0);
}

// iterate and count
while (iter.hasNext()) {
    var current = iter.next(out);
    for (var n = 0; n < input.length; n++) {
        if (!input[n].isNone() && input[n].hasIndexChanged()) {
            switch (input[n].getTag()) {
                case 1:
                    fatal[0]++;
                    fatal[n + 1]++;
                    break;
                case 2:
                    error[0]++;
                    error[n + 1]++;
                    break;
                case 3:
                    warning[0]++;
                    warning[n + 1]++;
                    break;
                default:
                    other[0]++;
                    other[n + 1]++;
            }

            // pass fail
            if (passFail[n + 1] == 0 && input[n].stringValueOf('Message').contains("TSC deadline timer enabled"))
                passFail[n + 1] = 1;
            if (passFail[n + 1] == 0 && input[n].stringValueOf('Message').contains("Scanning for low memory"))
                passFail[n + 1] = -1;
            if (passFail[n + 1] == 0 && input[n].stringValueOf('Message').contains("0.999"))
                passFail[n + 1] = 1;
        }
    }
}

// write to output
members[0].setIntValue(fatal[0]);
members[1].setIntValue(error[0]);
members[2].setIntValue(warning[0]);
members[3].setIntValue(other[0]);
members[4].setIntValue(passFail[0]);
members[5].setStringValue("All");
out.write(0, false, members);
for (var n = 1; n <= input.length; n++) {
    members[0].setIntValue(fatal[n]);
    members[1].setIntValue(error[n]);
    members[2].setIntValue(warning[n]);
    members[3].setIntValue(other[n]);
    members[4].setIntValue(passFail[n]);
    members[5].setStringValue(input[n - 1].getId());
    out.write(n, false, members);
}
progress.cont();  // forces the production to call this script again (with allready processed data), if more data arrives.
out.close(); // We want to get more input data but close the output - statistic is complete for this time
Create a custom chart
Last task of this article is to define a custom chart. Get to the impulse Chart preferences, click the "Add" button and select the "Script Chart".
The script below should be easy to read. It iterates over the samples of the previous statistics, checks the "Pass" member and paints a retangular area in red or green.
// painter : Painter object (de.toem.eclipse.toolkits.tlk.ITlkPainter)
// x,y,width,height: Geometry (int)
// color, background: Colors (Object)
// readable: Signal input (de.toem.impulse.samples.IReadableSamples)
// console: Console output (de.toem.impulse.scripting.IScriptConsole)

// fill background
painter.setBackground(painter.color(200, 200, 200, 255, true));
painter.fillRectangle(x, y, width, height);
painter.drawText("Status", x + 10, y + 10, true);
// iterate over stat signal
for (var n = 1; n < readable.getCount(); n++) {
    var val /*:CompoundValue:*/ = readable.compoundAt(n);
    painter.setForeground(painter.color(0, 0, 0, 255, true));
    painter.drawText(val.stringValueOf("Label"), x + 20, y + 0 + n * 50, true);


    if (val.intValueOf("Pass") == -1)
        painter.setBackground(painter.color(255, 0, 0, 255, true));
    else if (val.intValueOf("Pass") == 1)
        painter.setBackground(painter.color(0, 255, 0, 255, true));
    else
        painter.setBackground(painter.color(0, 0, 0, 255, true));

    painter.fillRectangle(x, y + 20 + n * 50, width, 30);
    painter.setForeground(painter.color(255, 255, 255, 255, true));

    if (val.intValueOf("Pass") == -1)
        painter.drawText("FAIL", x + 50, y + 30 + n * 50, true);
    else if (val.intValueOf("Pass") == 1)
        painter.drawText("PASS", x + 40, y + 30 + n * 50, true);
    else
        painter.drawText("?", x + 40, y + 30 + n * 50, true);
}

